Feeds:
Posts
Comments

Archive for the ‘Bushwalking stoves’ Category

These wind tests were done on my Trangia 27-1 using a Kovea Ti Supalite stove that has been modified by adding a pre-heat tube and stand, this allows the stove to be used in a remote canister configuration with the Trangia windscreen and base, the holes in the base were positioned away from the wind. The pot used was the 1 liter 27-1 Trangia pot.

Modified Kovea stove with Trangia base

The tests were done with the canister in an upright position, to get consistency I put an adjustable valve on the canister and ran the stove until the flame was at a fairly high stable level I then only used the valve on the canister to turn the stove on and off.

I placed stove on the test bench, I then placed the thermistor in the pot at 1 cm from bottom, started data logging program and at 10 second I turned the gas on and lit the stove, when water temperature reached 95º I turned the stove off, removed pot and re-weighed canister, noting the new weight. From logged data start temp was noted and fuel used, the fuel used was then normalized to grams of fuel used per 80º (g/80C)

Fan blowing wind on un protected stove

Results

Test 1, no wind, windscreen

Fuel used in grams per 80ºC = 7.5g

Test 2, wind with windscreen, stove was lit, then fan turned on.

Fuel used in grams per 80ºC = 7.3g

Test 3, wind, no windscreen, During this test it was obvious that it this system is greatly effected by wind and to raise the water to 95ºC was going to take some considerable time and fuel, I stopped the tests at the same time as the no wind test and as the heating rate is usually linear I extrapolate the results.

Fuel used in grams per 80ºC = 53.0g

Test 4, the  holes in base are placed into wind.

Fuel used in grams per 80ºC = 8.2g

Discussion of results.

As can be seen from the fuel used in the wind/no windscreen test the Kovea stove efficiency was affected quite a lot by wind but the use of the Trangia windscreen does improve the efficiency to the point where if used correctly, wind may have a very small affect on efficiency, the difference between the results of the no wind and wind/windscreen tests is very small the difference could be considered in normal testing error.

Trangia windshield under wind tests

Conclusion.

The Trangia stove system with its inbuilt windscreen is very good in windy conditions but it is preferable to place the holes away from the direction of the wind.

Read Full Post »

On the Trailspace forum I was asked a question “Had your tests been performed with a GCS pot, I think you would have seen very different results.  The GCS’s heat exchanger is fully exposed and therefore far more vulnerable to wind.”

So on the weekend I ran some wind tests on the Jet Boil Group Cooking System (GCS).

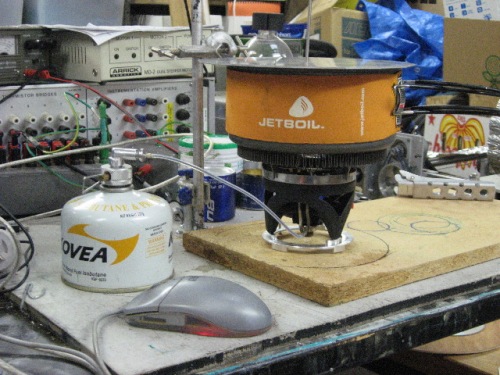
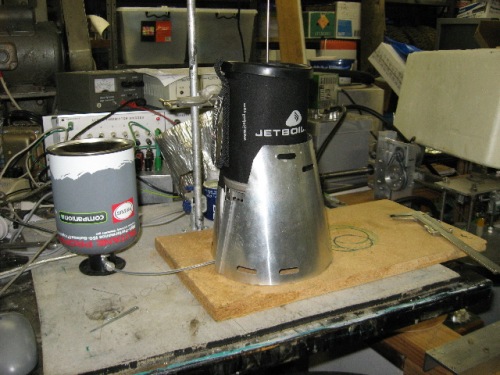
JetBoil GCS remote canister setup

Testing method

These test were done slightly different than the PCS tests as I ran the remote canister in upright configuration, I decided to do this to try and get better consistency in the tests, to do this I put a adjustable valve on the canister and ran the JetBoil stove until the flame at a high level and was stable I then only used the valve on the canister to turn the stove on and off. My STD 0.5 liters of water were used. The wind speed measured was around 12-15 kph.

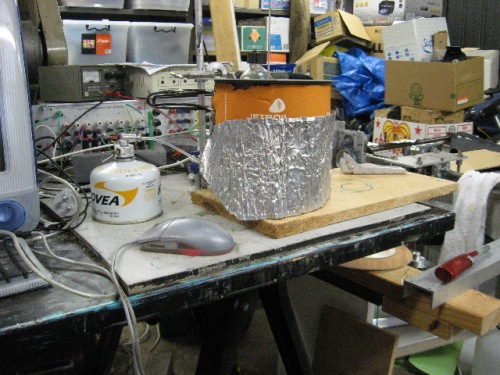
GCS stove with old MSR windscreen

Results

Test 1, GCS pot and remote canister JetBoil stove, no wind and no windscreen/

Fuel used in grams per 80ºC = 5.0g

Test 2, wind with windscreen, stove was lit then windscreen placed around stove, then fan turned on.

Fuel used in grams per 80ºC = 5.5g

Test 3, wind, no windscreen, During this test it was obvious that it this system is greatly effected by wind and to raise the water to 95ºC was going to take some considerable time and fuel, I stopped the tests at the same time as the no wind test and as the heating rate is usually linear I extrapolate the results.

Fuel used in grams per 80ºC = 25.4g

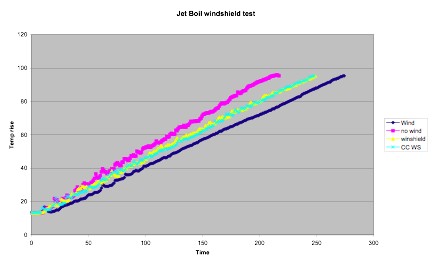
JB GCS wind tests heating rate

Heating rate graph, pink line no wind/ no windscreen, blue line, wind/windscreen, yellow line wind/no windscreen

Discussion of results.

As can be seen from the fuel used in the wind/no windscreen test the GCS stove efficiency is affected quite a lot by wind but the use of a windscreen does improve the efficiency and possibly if the windscreen is setup properly wind may have no effect, the difference between the results of the no wind and wind/windscreen tests is very small this difference could be considered in normal testing error.

Conclusion.

Unlike the PCS stove the GCS stove system efficiency is greatly affected by wind but the use of a good fitting windscreen can greatly improve efficiency to the point that the wind may have little or no effect.

Read Full Post »

Following on from the hanging stoves I fired up the test bench on the weekend and ran some wind tests on the JetBoil stove that I have modified for the hanging stove.

Testing setup


Test procedure.


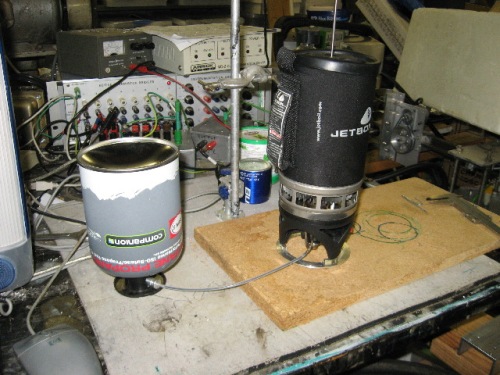
Part of the design of my JB hanging stove is that it does not have to be hung, it can be used as a normal remote canister stove, for these test I used the stove as a remote canister stove.

JB hanging stove used as remote canister stove


The stove was placed on my test bench with a small pedestal fan placed a meter away,  I placed my old Vane Anemometer on the bench and tested wind speed which was measured at around 12kph (note, the wind speed feels faster that 12kph but I could be wrong) I then attached the stove to the canister and took note of weight, measured 500g of water in pot, replaced lid.

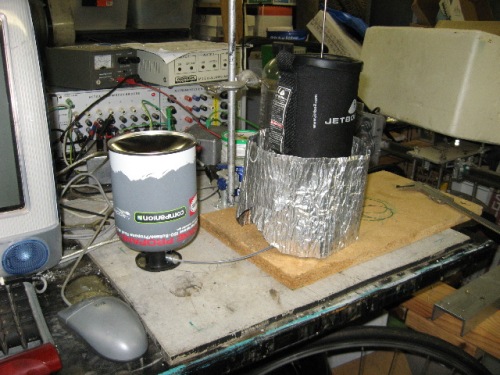
Test with MSR windshield


I then placed stove on test bench, placed thermistor in pot at 1 cm from bottom, started data logging program and at 10 second started stove and adjusted to a high flame setting, when water temperature reached 95º stopped stove, removed pot and re-weighed canister, noting the new weight. From logged data start temp was noted and fuel used was normalized to grams of fuel used per 80º (g/80C)

Using Caldera cone windshield


The tests


The first test was with no windshield and no wind, this is used a base line figure.


Results, fuel per 80ºC = 6.1 g


The second test was with the fan on but no windshields.


Results, fuel per 80ºC = 8.2 g


The third test was with fan on and using an old MSR wind screen which was placed completely around and secured together with a clip.


Results, fuel per 80ºC = 7.4 g


The fourth test was using a Trail designs Caldera Cone windscreen, this windscreen is designed for a BPL Ti 550 pot and was too small to fit over the JB pot with the cozy on it, so I placed the windscreen as best as I could around the pot with the gap opposite the fan, the fuel line came out this gap.


Results, fuel per 80ºC = 6.9 g


Below is the heating rate graph, the fastest boil (pink line) is the test with no wind the slowest is the test with wind but no windshield.

Wind tests


Discussion of results.


First I wish to point out that these tests are not what I would call scientific, I only did one run per test and with canister gas stoves they are very hard to adjust to repeat runs, but there is a trend that fits in with what I was expecting.


The result clearly show that there is a reduction of efficiency with the introduction of wind, and that a windshield does make a difference, I am surprised how little loss of efficiency the JB system has with no windshield., from past tests with a normal upright stove with no windscreen there was a much high loss, I am also surprised with this system what little difference a windshield made to the efficiency and these test the CC windshield was only marginally better that the MSR windshield.

Read Full Post »

I am not a climber and probably will never be, I enjoy fiddling with stove design.

Concept prototype

I got interested in hanging stoves a few weeks ago after reading a comment about hanging stoves on an Australian Bushwalking forum, the comment reminded me of liquid feed stove system I started working on about five years ago, as can be seen from the photo I put a Pocket Rocket stove on the base of an upside down canister, part of the idea in doing this is in very cold conditions there is an option to put some of the reflected heat back into the canister, for some reason I shelved this idea until now. While I do not climb I can see some advantages of  hanging stoves in some cases in backcountry snow camping.

A hanging stove idea prototype

I started my recent hanging stove project by making a simple hanging stove bracket to hold the canister upside down, I then made some legs and a pre-heat tube modification for a Gnat Ti stove (called Kathmandu Backpacker Stove Titanium here in OZ), the legs have been made to clip on the base of the canister. This worked well except the Gnat stove has something wrong with it and I have difficulties with simmering in both the upright canister configuration and liquid feed configuration., I have since replaced the Gnat with my favorite a Kovea Supalte Ti stove and all is working well.

Hanging a Chinese remote canister stove

My cheap remote canister stove then turned up and with the current hanging plate the new stove fitted very nicely on the base of the canister, but I will point out that at the moment this is just playing with design and I realize that with this system would be difficult to fit a wind shield and pack away.

liquid feed JB PCS stove

The next part of my hanging stove project was to use a JetBoil Personal Cooking System (PCS) with a liquid feed modification that I had done a number of years ago will before JetBoil came out with the Helios I have used my modified JB stove in winter in Australia a few times so I know that it works in cold conditions.

Pre-heat tube

I needed to hang the canister on the base, so I machined up a bracket that screwed onto the plastic shroud, the bracket takes the std JB 100g canister, I did the machining so the canister clips in so it does not fall out while it is still easy to put in, and that it would still fit into the JB PCS pot.

All packed away

I then needed some way to hang the JB stove, I did not want to buy a JB hanging kit as they are expensive here in OZ, so I got a some spare tent poles and some SS wire form the local fishing store and made a rough copy, while the hanging kit is OK for display purposes I would not like to assemble it on the side of a cliff at -20ºC, some more design thoughts needed here.


Where to next, as I am not a climber I have been doing some research on hanging stoves to try and understand what is needed, I have also been in contact with a leading British Climber to try and get an understanding of what is needed. So far I have found a few ideas, one is using a larger pot as the windshield, his seems to be very popular and I have seen this done with backpacking stoves, I have also found that my idea of hanging the canister upside down under the stove is not a new, it was done very nicely to a WindPro stove by Longshanks in Denver and the idea posted on a climbing forum last year. http://students.washington.edu/climb/forum/viewtopic.php?f=19&t=5759&start=0

I am combining this project with one that I have been thinking about doing for a while and that is windscreen design.

This project will continue.

Read Full Post »

My fascination with bushwalking stoves has driven me to what is possibly a first for a hobby stovie, I have made myself a stove flame profiler which can do 1D and 2 D profiles of a backpacking stove flame.

Flame profiler rig

I have been planning this flame profiler for a few years now and I have been collecting bits and pieces since, I started to build the profiler about a 18 months ago but due to distractions the development stalled several times, the profiler project is still in its early days and as I am learning from it, I still have some development and improvements to do.

I wish to thank my friends Tony, Mike, Andrew and Mark (sadly no longer with us) for their help, but I would specially like to thank Peter for his top level programming skills, without the help and equipment gifts from these highly skilled people this flame profiler project would have never been possible.

The Flame profiler is an X-Y traversing system that can move a heat exchanger with a high temperature thermocouple temperature probe in the middle of the heat exchanger, the temperature data can be logged and recorded for analyzing with a 2D or 3D graphing program.

Heat exchanger

Details

The heart of the system is the X-Y traversing system, the traverser was started with being given some stepper motors and part from an old plotter which has about 600 mm travel, this has become the Y traversing system, it is driven by wire rope wrapped around a pulley and the propulsion is by a stepper motor. The X traversing system is made from an old linear bearing rail, for the X system I have made my own wire rope propulsion system, it is also driven by a stepper motor, the X system still needs some development but works OK for now.

Heat exchanger

The heat exchanger is made from an old saucepan which has a base diameter of 206mm, the base is 6mm thick and the temperature probe is located in the middle, the heat exchanger is filled with water which is conditioned with water pumped through some copper tubing which is coiled inside, conditioned water is pumped through the copper coil. I made the current heat exchanger system as a trial system as I was not sure what was needed and while this heat exchanger system while it works quite well, for some alcohol stoves the 206mm diameter is a bit small and the water conditioning system is a bit crude. I am planning a larger heat exchanger of around 400mm diameter with a direct flow through of the conditioning water but I am surprised how well the copper coil system works so I will doing some more thinking on the new heat exchanger design.

Stove platform

At the moment the stoves being tested sit on very crude adjustable height platform, the base of this system sits on an old computer case and an old car jack which gives me the ability of an easily adjustable height, while for now the system works, improvements to this setup will be high on my priorities to improve.

Temperature probe and signal conditioning

The temperature probe is home made from a K type thermocouple, the thermocouple wire is threaded through a piece of ceramic tube with two holes through it.

The thermocouple signal is conditioned through a modified Jaycar Electronics high temperature thermocouple kit, this kit converts the very small thermocouple voltage into a voltage that can be read by the data acquisition system, at the moment the maximum temp that I can read is 1043 degrees C.  I am not that happy with the thermocouples response time, I am going to try and improve this by making my own thermocouple with a smaller tip.

The conditioned data signal is then input into a National Instruments USB-6008, 12-Bit, 10 kS/s Low-Cost Multifunction DAQ A-D board, the voltage signal is then converted into temperature degrees ºC with a program written with Labview 7.

The Stepper motors are also controlled with a program written with labview through the parallel port, the profiler control program and data logging program are linked to the same timing.

The tests that I have done so far have been 1D and 2 D profiles, with the 1D profiles I ran the probe at 1mm per second and logged 1 sample every second

The 2D profiles, I ran the probe over in a matrix of 5mm x 5mm in a 100mm x 100mm square, the data was graphed in 3D using Mathmatica, I am new to this program and need do some more learning to make the graphs look better.

Why have I made a flame profiler? I am interested in understanding stove design and I think the profiler will help in this endeavor.

Some result so far

Below is a 2D graph of  a 1D pass over a JetBoil stove with the probe protruding 4mm, 2mm and the tip flush with the bottom of the heat exchanger, note the large difference in temperatures.

profile of Jetboil stove with different tip protrusion lenghts

Below is a 3D graph of the flame pattern of a JetBoil stove, what confused me here is the high and low temperature pattern in a cross, after some thought I pulled the burner head apart and as can be seen from the photo below the baffle inside has four support legs, even though the legs are relatively small it can be seen from the graph they have a reasonable large influence on the flame pattern.

JetBoil flame pattern

I still have to fully understand what is going on with the information that the profiler is giving me, but I hope that will come. I will post more results for different stoves on my blog soon.

Read Full Post »

Older Posts »